
Getting started with Market Sync for WooCommerce
Install the Market Sync plugin in your WooCommerce store, connect it to Market Sync and add your first marketplace connection.

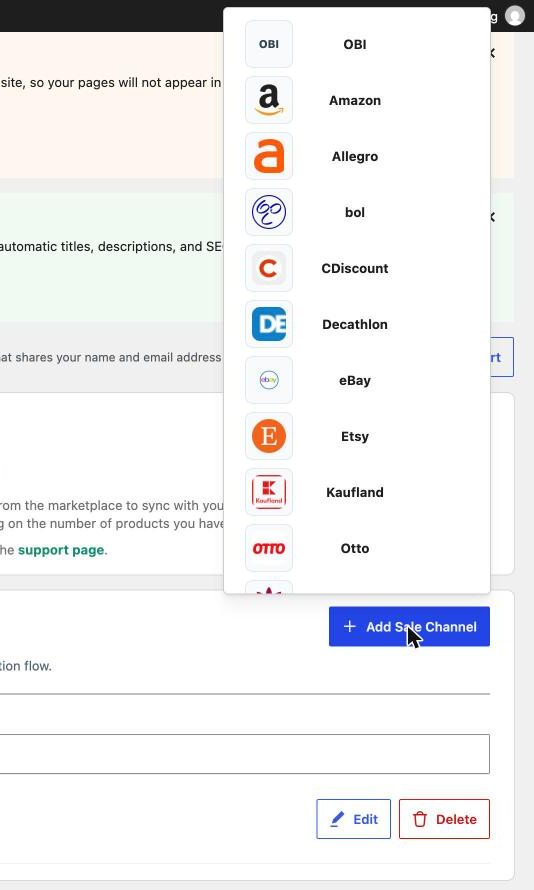
Market Sync for WooCommerce connects your WooCommerce store to online marketplaces such as Amazon, bol, eBay, Etsy, Kaufland, Otto and more. Products, stock and orders are synchronised between your store and your sales channels, all managed from your WordPress admin.
This guide walks you through installing the plugin and making your first connection. It takes about five minutes.
Before you start
- This plugin is for WooCommerce stores. WooCommerce must be installed and active on your WordPress site.
- You need a WordPress administrator account so you can install plugins.
1. Find the plugin
In your WordPress admin, go to Plugins → Add Plugin and search for Market Sync.

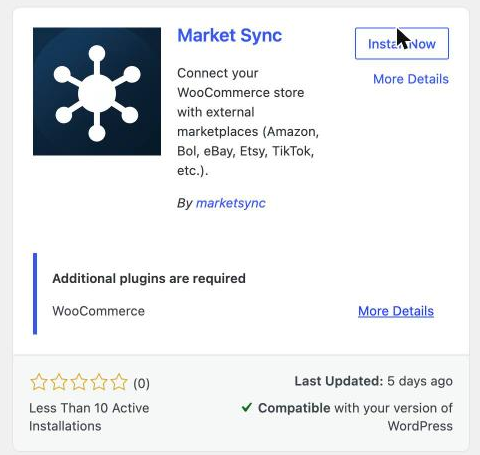
Look for the plugin named Market Sync by marketsync. The search returns many results, so you may need to scroll down to find it.
2. Install the plugin
Click Install Now on the Market Sync card.
3. Activate the plugin
Once the installation has finished, the button changes to Activate. Click it.
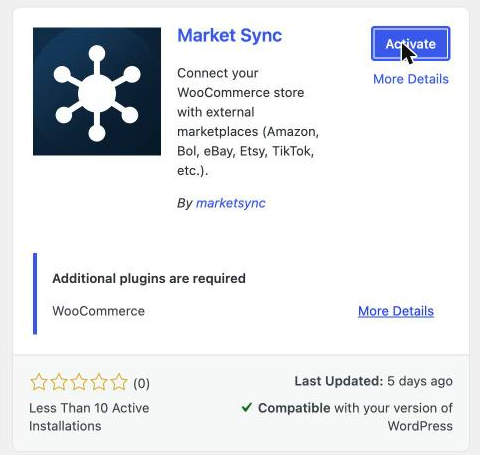
WordPress confirms with Plugin activated and a new Market Sync item appears in the left-hand menu.

4. Open Market Sync
Click Market Sync in the WordPress menu. The first time you open it, you will see a notice that Market Sync is not connected yet.
5. Connect your store to Market Sync
Click Connect store to authorize your WooCommerce store.
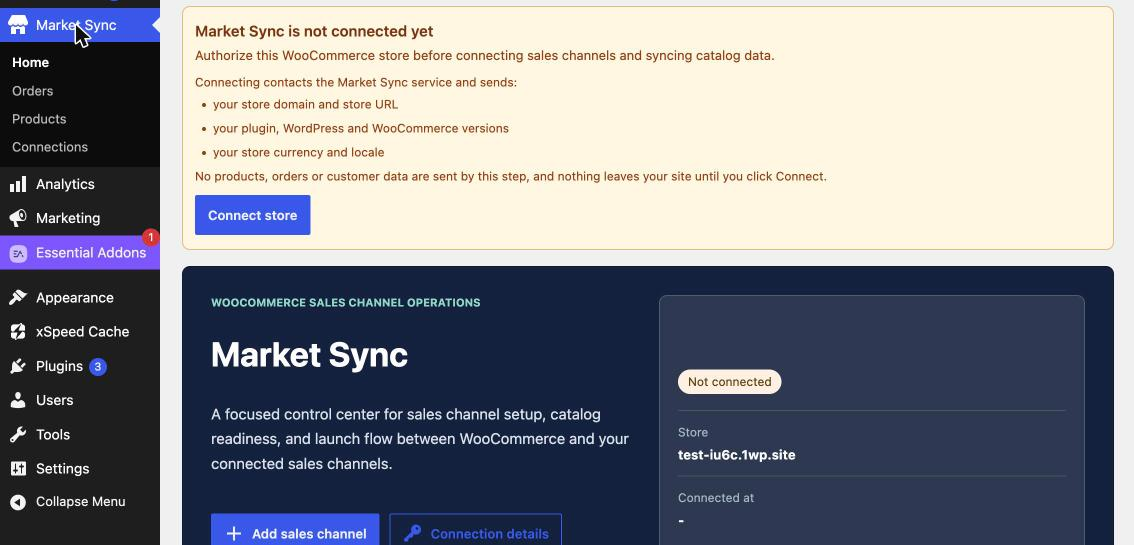
Connecting only shares your store domain and URL, your plugin, WordPress and WooCommerce versions, and your store currency and locale. No products, orders or customer data are sent in this step.
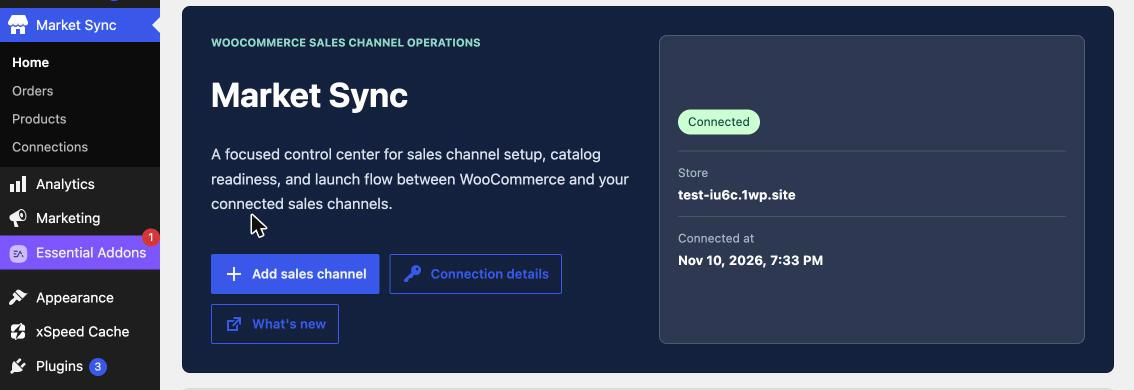
After a few seconds the status changes to Connected and your store domain and connection time are shown.
6. Add your first connection
Go to Market Sync → Connections. This page lists all your sales channels and is where you add new ones.
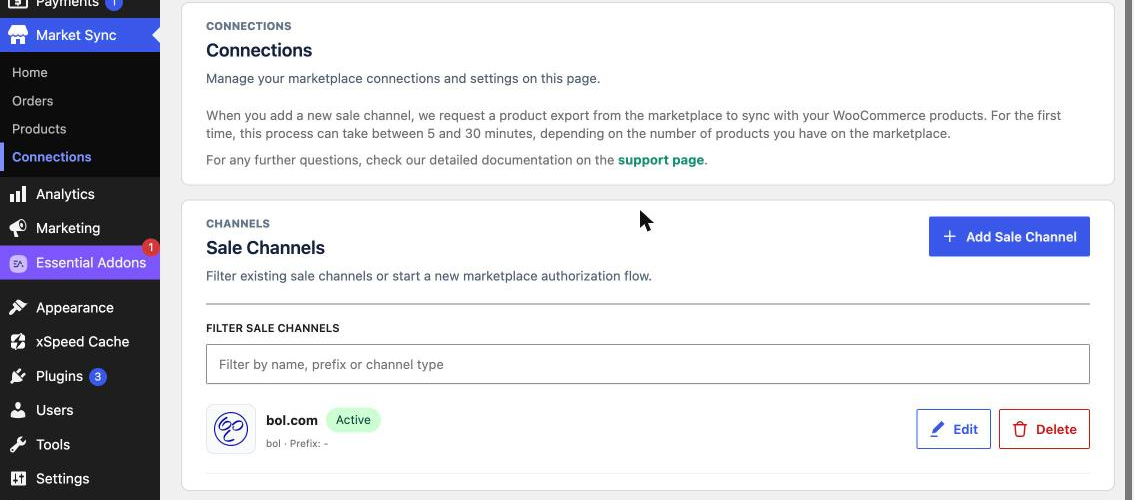
Click Add Sale Channel and choose the marketplace you want to connect. Follow the authorization steps for that marketplace.
When you add a new sale channel, Market Sync requests a product export from the marketplace to match it with your WooCommerce products. The first time, this can take between 5 and 30 minutes depending on how many products you have on the marketplace.
Need help?
Click Contact Support at the top of any Market Sync page in your WordPress admin, or email [email protected].
Was this article helpful?
Thanks for your feedback!